How Sidearms work
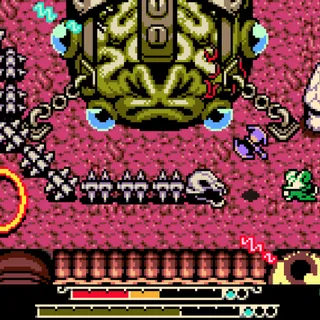
Sidearms are Mina’s secondary method of attack — burst tools for damage, healing, crowd control and traversal that can’t replace your main weapon. They spawn from pre-determined destructible objects out in the field, plus shops, chests and quest rewards.
A few hard rules define the system:
- You carry only one Sidearm at a time. Choosing which one to equip is part of every loadout.
- They’re powered by Joules. Each use spends Joules from your reserve; refill at Joule Jars (break objects to find them) and raise your maximum with Joule Boxes (eight total).
- You lose your equipped Sidearm on death, the same way you drop pocketed Bones — some trinkets help you retain it.
- The Sidearm Damage stat (from Bone Up, capped at level 10) increases their effectiveness.
How many are there?
There’s a small count discrepancy: Yacht Club Games’ official “by the numbers” says 14 Sidearms, while DualShockers and GameSpot count 15. Treat roughly 14 as confirmed and flag the exact total for post-launch verification. The table below covers every named, documented Sidearm.
Full Sidearm list
Filter by tier. Tiers reflect the DualShockers “10 Best Sidearms Ranked” ordering plus GameSpot’s notes (the Drill Driver as the single most useful, the Iron Steed and others as “very situational”).
Joule Box locations (8 total)
- Ossex: Emporium — three sold by the merchant for 500, 2,000 and 4,000 Bones.
- Southern Outskirts: Cave Network — puff-plant platforming; clear walls with a launched puff plant and a Bonestone Shard, then take the stairs to the chest.
- Backwater: Pinky’s Parlor — take the path right of the Parlor to the back, burrow under the ladder to “borrow” it, set it by the wall, and climb up.
- Sandfalls: Sifting Sands — bomb the moving sand against the cliff (top-left) to open an entrance, beat a Bone Mimic, and grab the chest on the right.
- Eastern Heath: Buckler’s Bluff — from the Grasslands, unlock the Kear lock by the Mourner’s Mile boundary, head north (you need the Drill Driver to cross gaps), and climb to the top chest.
- Western Wilds: Secret Passage — enter with the Drill Driver and two Kears; one screen down from Ossex’s west gate, dive into the 3×3 water tile to find the Secret Passage, then Drill-Driver across the gaps to the top chest.
Two further Joule Boxes round out the eight; verify their exact spots in GameSpot’s full list post-launch.
| Detail | Value |
|---|---|
| How many you carry | Only one Sidearm at a time |
| Powered by | Joules — refill at Joule Jars |
| Joule capacity | Raised by Joule Boxes (8 total) |
| On death | You lose your currently equipped Sidearm |
| Total Sidearms | 14 official; some guides count 15 |
| Sidearm | Effect | Joules | Tier |
|---|---|---|---|
| Angler’s Raft | A traversal aid for crossing large ponds and rivers (pairs with the Fishing Rod context). | Uses Joules. | C |
| Beckoning Collar | Summons a friendly imp that orbits Mina and auto-bites nearby enemies, reaching flyers out of your weapon’s range. It passively drains Joules and explodes when Joules run out or on command. Good against flying foes, bosses and minibosses. | Uses Joules. | B |
| Bounding Bombs | Two bombs that must meet to deliver their full (extremely potent) effect. The high Joule cost makes them often not worth it. | High Joule cost. | C |
| Deflector Parasol | Tap to throw a parasol forward that deals contact damage and blocks projectiles, reflecting physical attacks. Hold it overhead like a held object and hold Jump to float and slow-fall across long gaps; tap again to throw. Versatile defense plus traversal. | Uses Joules. | B |
| Drill Driver | Launches Mina a short distance forward with strong knockback — shove small foes into pits or hazards for instant kills, with bonus damage if they hit a wall. A key traversal tool: combine it with a burrow-jump to cross the biggest gaps. GameSpot calls it the single most useful Sidearm. | Uses Joules. | S |
| Dynamo Lantern | Wound up and then thrown out on a chain a few tiles ahead, delivering several large electric bursts at its apex. Smaller AoE but melts large enemies and bosses (a “Boss Buster”). The long windup makes it best against slow foes. | Uses Joules. | B |
| Fishing Rod | The only Sidearm you must unlock first (borrowed from an alligator brother in Nox’s Bayou, then kept). Makes fish-shadows appear in all water — even puddles — so you can catch fish and critters that drop Joule Jars, Plasma Roses, flowers and Mana. A combat-support MVP per beginner guides. | Uses Joules. | A |
| Gyro Dagger | A spinning throwing dagger that boomerangs back to Mina, hitting multiple times as it spins. Smack it with your weapon to send it forward again and juggle it indefinitely with good timing for sustained damage lines. | Uses Joules. | A |
| Hollower’s Rocks | Throwable rocks. Very situational — only about two areas allow their longest-range throw. | Uses Joules. | C |
| Iron Steed | A pedal-bike mount that moves faster than walking or burrowing and can jump while mounted to clear long gaps. Ring its bell to agitate and draw enemies; it damages enemies on contact, but you fall off. Mainly traversal and enemy corralling — GameSpot calls it very situational. | Uses Joules. | C |
| Mist Jar | Mina flashes green and dashes a long distance on the ground or in the air. Passing through an enemy deals no damage to her but recovers a little health and builds Plasma — one of the few healing sources besides Plasma Vials. Also helps against shielded enemies. | Uses Joules. | S |
| Recall Disc | The first use drops a portal in front of Mina; the next use teleports her back to the portal with a powerful explosion — an instant escape plus AoE damage. Set traps in boss arenas to warp through danger and explode. | Uses Joules. | S |
| Volt Hatchet | A Castlevania-style throwing axe lobbed in an arc that crashes down and releases small blast/shock waves in four directions. Damages on flight and on detonation, can hit clustered foes, and can be thrown over walls from elevation. Slow flight makes it best against large, stationary enemies. | Uses Joules. | A |